Even the best sewing machine won’t work well without regular maintenance. Without regular oiling, all the cogs and gears that run the mechanism simply start to wear down due to excess friction. After a while, this significantly lowers the lifespan of your sewing machine.
So, to help your sewing machine live a long and happy life here’s a guide on how to oil your sewing machine. Let’s jump right into it!
Grab the Manual
 First things first – while beginner sewing machines tend to be similar, there are still differences both inside and on the outside of various models. Here, I’ll give you some general guidelines (based on my old but faithful Singer Prelude) that should apply to most regular sewing machines out there, but chances are that something will look or be positioned slightly differently in your model. That’s why you should go and grab the user manual of your sewing machine, where you’ll find both the machine parts schematic, and maintenance and oiling instructions for your particular model.
If you don’t have your user manual on hand
If you’ve lost your user manual or it’s simply buried in heaps of manuals and warranties that you don’t feel like sifting through, you can find almost any sewing machine manual online.
Simply go to Google, and type in these keywords:
the manufacturer and the model name + “manual”.
So, for my sewing machine, I’d need to type in “Singer Prelude manual” OR “Singer 8280 manual” and the PDF version of the user manual is right among the top results!
Pick the Right Oil
You shouldn’t use just any oil on the market, even if it’s machine oil. Instead, always pick oil made specifically for sewing machines. Unlike regular machine oil, sewing machine oil is very watery and clear, so that your thread and fabrics won’t get sticky.
Oil for sewing machines is very affordable and readily available in many stores in bottles of various sizes.
How to Oil Your Sewing Machine
Before you grab your oil bottle and start squirting it around, you should first and foremost clean your sewing machine. You’ll need a screwdriver, a brush, and a soft cloth that doesn’t leave fibers around (think muslin or microfiber). I explained the basics of taking care of your sewing machine including cleaning in this blog post: sewing machine maintenance.
Always unplug your sewing machine from the electric outlet before doing any type of maintenance on it. Also, remove the needle.
To clean it properly, you’ll need to take your sewing machine apart slightly. In particular, you’ll have to
- Open the accessory box to reach the bobbin,
- Remove the needle plate to clean above the bobbin case, and
- Remove the face plate to clean and oil the moving parts that control the top needle and thread tension.
When removing lint, make sure to brush it out of the machine, not deeper into it. That’s also why you shouldn’t use compressed air to clean your machine, even though it may be more effective, it can also drive lint deeper into the mechanism.
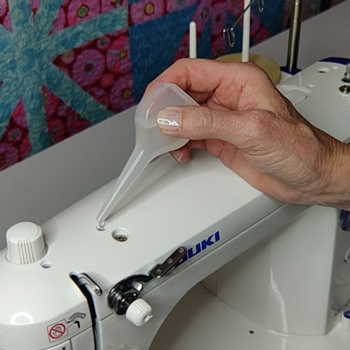
Consult your sewing machine manual for exact places where you should put oil. As a general rule of thumb, the most important place to oil is where two moving parts made of metal touch one another.
Always use only a drop or two of oil and wipe off the excess with a soft cloth that doesn’t have loose fibers.
1. Bobbin Case
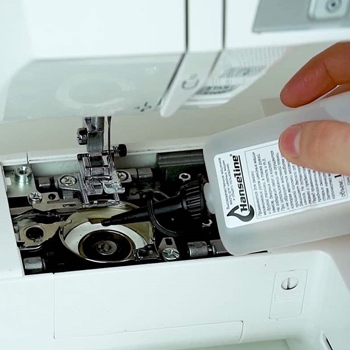
First, remove the bobbin case. Then, pull the two hook retaining arms on the sides of the bobbin mechanism to release it. Take all the available parts out and clean them with a soft cloth. Take a bit of oil and lubricate the hook and ring of the bobbin case. Use only a drop of oil and wipe off the excess.
2. Face Plate Mechanism
Then, remove the face plate of your sewing machine. The face plate is the cover that protects the upper left mechanism that moves your needle and controls the thread tension. When you remove the face plate, clean inside of it. Rotate the flywheel of your machine (towards yourself) to see where the parts of the mechanism meet and put a drop of oil there.
How Often Should You Oil Your Sewing Machine?
 How often you clean and oil your sewing machine really depends on how intensely and frequently you use it.
First of all, you’ll likely hear it when your machine needs oil – the buzzing, humming, or the sound of stitching may become much louder. But remember that lubricating your sewing machine is much like drinking water: if you’re thirsty, it’s too late.
- If you use your sewing machine on a daily basis, or at least a few times a week, the best frequency of oiling for your machine is about once every three months or so. However, you should definitely clean it more frequently, for example, every week. You can even clean and oil it daily to keep it running smooth, but there’s rarely ever need for that unless you’re sewing professionally nine to five on an industrial sewing machine.
- If you’re a hobbyist and only use the machine a couple of times a month, then you can wait up to a year between oiling. Most professionals recommend doing it every half a year or so, but then again, back when I was just starting out, I didn’t oil my first sewing machine for three years and it worked like a charm with no issues.
In either case, you should take your sewing machine for regular maintenance to an authorized repair shop once every two years. Even if you feel it works as it should, a check-up by a professional can prevent the machine from dying on you all of a sudden and make its life longer and happier!
Wrap Up
Regular sewing machine maintenance is beyond important – it keeps your sewing machine happy and healthy, and it helps keep your seams seamless! That’s why you should clean and oil it every once in a while.
I hope I explained everything you need to give your sewing machine proper maintenance. If you have any questions left, don’t hesitate to write a comment down below, and I’ll get back to you ASAP.
