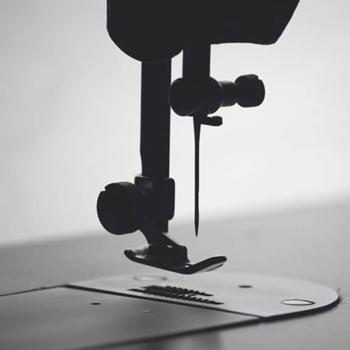
 Most of the time, sewing is rather fun and enjoyable. However, once in a while, there comes a time when you feel like pulling out your hair in frustration. Several problems come up every once in a while in every tailor’s path. From thread puckering to skipped stitching, these issues are all too familiar to most seamstresses, no matter if you’re used to working on a budget or on a high-end machine.
Today, we will go through some of the most common issues that may happen while you’re stitching and give you possible solutions. Hopefully, these can help you resume working on your project without losing too much time and nerves.
1. Fabric Puckering Up
If your stitching seems to make your fabric pucker up as you sew, there are several things you should check to try and fix the problem.
1.1. Thread Weight
First of all, you should make sure that your needle and thread weight match your fabric. As a general rule, you should use thinner needles and light thread with lightweight fabrics like silk or chiffon. On the other hand, a thick needle and a heavy thread are necessary if you’re using corduroy or denim – you may even need one of the best heavy-duty sewing machines for leather for some of the thickest materials.
1.2. Thread Tension
If adjusting your needle and thread choice doesn’t help, you should check your thread tension. Find the top thread tension dial on your machine – it’s usually situated at the top side, close to the thread path. Your tension settings likely range from 1 to 9, or another numerical scope. Generally, lower numbers stand for lower tension, which is used for lightweight materials. On the other hand, the numbers in the upper range are perfect for heavyweight and tough fabrics.
1.3. Uneven Feed
Finally, if these adjustments don’t make a difference, you should check whether your feed dogs are working correctly.
First of all, make sure the feed dogs are engaged. You can do this by stitching without any fabric. If the feed dogs (the rows of metal “teeth” or spikes located under your needle) move as you stitch, the feed dogs work as they should. If you can’t see the feed dogs, they may be retracted – which is a common setting on quilting sewing machines.
If your feed dogs work, but the problem persists, you can try helping your feed dogs pull the fabric well by using a walking foot. This foot has a row of teeth similar to feed dogs, which are used to pull the fabric from the top as well, in unison with your feed dogs. The walking foot ensures even fabric feed through the machine, which helps proper seam formation.
2. Thread Bunched Up, Easy to Pull Out, Snapping, or Stitches Skipping
Wrong thread tension is a common problem that can result in many issues with your stitches. A bad set-up on your top thread or bobbin thread tension can leave you with thread which is bunched up on the wrong side, a thread that’s easy to pull out, skipped stitches, or even your thread flat-out snapping as you work. Thread tension is the single most frustrating issue for beginners at sewing. So, what is thread tension anyway?
Essentially, the two threads used for machine sewing play a tug-of-war, pulling on each other to create a stitch. You want the two to be equal in power, and suitable for your fabric if you want to get a stable, sturdy seam. But if one thread is too tense or too loose, many problems can occur, including the ones we mentioned above.
If your thread is bunched up on the wrong side, you may find it hard to remove your fabric from the machine. Cut through the thread with small scissors, open your bobbin case, and carefully remove all of the thread. Then, re-thread your machine, and pick up a spare piece of cloth to test on until you find the correct settings. Make sure that your presser foot is in its up position while you’re threading.
2.1. How to Adjust Thread Tension
After you’ve re-threaded your machine, you should find the correct tension settings before continuing to work on your project.
Almost all regular sewing machines let you set up the top thread tension, using a numeric dial somewhere on the top of the machine. Thicker, heavyweight fabrics require a higher number, while delicate, thin fabrics work best with lower tension settings.
You can also set up your bobbin thread tension. Some machines have a special dial for this, while others require you to turn the screw on the bobbin case while your thread is inserted. Turn little bits at a time, less than a quarter of a circle, and test until you find the right tension.
2.2. Additional Tips
Even though it’s by far the most common source of stitching issues, tension isn’t everything.
Make sure that you use a fitting-weight, high-quality thread on both your bobbin and top and a new, appropriate size needle as well. As we mentioned before, you should use a thicker needle and thick, sturdy thread for heavyweight fabrics, while lightweight, thin fabrics require appropriately thin needle and thread as well.
Make sure to renew your needle and thread collection every now and then as well. Old needles rust, get blunt, and suffer heavy wear and tear with use, so you should use a new needle for each project. On the other hand, you should get rid of that set of thread you inherited from your grandma since thread goes bad and brittle over time. Tie a piece of thread in a knot and pull on the sides to test whether the thread is strong enough. After all, you don’t want to devote your time to a sewing project only to have it fall to ruin in no time because of a faulty, old thread.
Finally, make sure to clean and oil your sewing machine regularly to ensure it works as it should. In general, you should do regular maintenance once a year, or a bit more or less frequently depending on how much heavily you use your machine.
Check our homepage to learn more about getting the ideal sewing machine for yourself and how to keep it running well for years to come.
3. Needles Breaking or Bending
 Sometimes, it just happens – you’re stitching away without a care in the world, and suddenly you hear a loud noise, the tip of your needle flings away, and your machine refuses to continue working. Your needle is broken, and this can be as dangerous as it is annoying! There are a couple of things that might have gone wrong.
3.1. Wrong Needle Thickness
The most common reason for snapped needles is that the needle choice isn’t correct for the project at hand. In particular, you should make sure that the needle you’re using has the right thickness for the fabric you’re stitching. Make sure that you use a thick, heavy-duty needle for any heavyweight fabric, such as denim, canvas, and tweed. On the flip side, a delicate fabric requires a thin needle. You can get sets of needles with different thicknesses for any sewing machine out there.
3.2. Old or Brittle Needle
We can’t stress this enough – use a new needle for every project! Even though this may not seem very cost-efficient, it will surely save you a lot of frustration and wondering what has gone wrong. As you sew, the tip of your needle gets blunt, and the eye of the needle gets damaged as well. An old needle will not only break easily, but it will also cause your thread to snap.
3.3. Bobbin Thread Buildup
Finally, if you’re using the correct-size, new needle, but it still snaps, you should lift your fabric to see whether your bottom thread is stitched correctly. Sometimes, your needle will snap before you notice that the bottom thread is all bunched up. If this is the case, with every stitch, your needle hits a thicker and thicker bunch of tangled thread, and it will naturally snap if it can’t go through. Refer to the previous section to correct your thread tension if this happens.
Wrap Up
Encountering an issue with your sewing machine can be a real buzz-kill when you’re sewing away, deep in the zone and focused on your project. But even though these problems may seem very frustrating at the beginning, they are usually very easy to fix on your own, and in no time.
Hopefully, we helped you find out what’s wrong with your sewing settings, and helped you continue with your project without major delays! If you didn’t find the correct solution to your problem, we recommend taking your sewing machine to a specialized repair shop for a check-up. On the other hand, if you’re facing an issue we didn’t cover here, feel free to send us a message, and we’ll get back to you as soon as possible!

My Bernina, when I rewind the bobbin no longer lets me go back to the home screen and I have to turn the machine on and off again. Is there anything that can be done by me to correct this?
Hi Betty,
I don’t have an extra solution for this one. But let’s hope someone else answers this question on this page 🙂
Cheers!